Slider

Little Lady Triangle Quit

Monday, October 27, 2014 •

Finally it's done! This was a labour of love over a short period of time but I am thrilled with how it turned out.

And I think she loves it too...


I had a vision in my head for how this quilt would come out- what I ended up with is absolutely nothing like I had planned! My friend Erica had been waiting to finalize the nursery until sweet baby arrived and they knew if it was a boy or girl. The colour would be grey, orange and blue or pink. I had planned out a square quilt with the elephant print from Premier prints along with some coordinating polka dots, chevrons and solids. Those fabrics needed to be ordered because they are not available locally.

Then, during one of my marathon Pinterest sessions, I saw a gorgeous triangle quilt by See Kate Sew and immediately changed my plan. Triangles would be happening. I went to Atlantic Fabrics for a completely unrelated reason (ninja headbands in you must know) and came face to face with a pearlized collection of greys. Next thing i know I had about 10 bolts of fabric on a cutting table trying to find the right combinations of pink, orange and grey.


I was finally happy with Kona Solids in pink, orange and grey, two of the grey pearlized fabrics, an orange herringbone from Henry Glass and a pink circle design from Riley Blake.

After the Ninja Turtle party was over on Sunday (post to come) I decided to destress with a triangle template and some gorgeous fabric. Kate's tutorial is great so I'm not going to reinvent the wheel. This quilt was done in 7-8 hours. I found laying out the quilt to be a little tricky because I was using the guide on my iphone screen and I kept losing my place. Once I had the rows layed out and stacked in order the sewing was pretty quick.

I followed the advice of Jeanette at Stamp*Stitch*Create and used spray adhesive to attach the backing to the batting to the quilt top. I tried to make sure there were no wrinkles and I left that to bond overnight (because I ran out of steam...lol)


I decided to only quilt the grey triangles in one direction per row. I love how that looks on the backing. I also appliqued an "L" on the backing before assembling the quilt.


I just love how the colours all work together. I almost wanted to keep it for myself! But I couldn't deny this little cutie..It truly is a very comfy quilt.


Kids Clothes Week- Spring 2014- Day 1

Wednesday, April 9, 2014 •

Sew look what is here again already?!
kid's clothes week

I have a ton of stuff on the books for this week! I was fabric stalking one of my favorite sites, Hawthorne Threads, and came across the Littlest collection by AGF Studios. Easter and spring are in the air and I HAD TO HAVE this collection...congratulations to me...my fabric fast lasted about a month...But really how could I not snap this up? It is fresh and classic and just makes me want to sew everything with it.


Despite what you all think I didn't immediately jump on the pink for Miss A's easter dress. I actually went with the "Pine Woods" border print and Teensy Weensy in Pine for the collar and trim.   Over the weekend
I finished Amelia's Easter dress only to realize that I should have made it about 2" shorter...but it's a border print so I will need to take it up at the waist. And the puff sleeves.... why oh why did I want her dress to be so vintage inspired? I need to thank the ladies in one of my facebook sewing groups for helping me out with the sleeves. I think you'll agree they look so much better now!

The pattern for the dress is the Sweet Dress by The Cottage Mama. I received her book Classic Sewing for Girls for Christmas and just love the return to very classic styles of dresses and smocks.


I haven't shortened the dress yet or added the buttons to the back so please forgive the hanger photo.  I'm loving the classic cuteness factor of the dress. The skirt could be a little more full so I think I'll double the skirt measurement when I make her birthday dress. Now to make a matching tie for Austin!

Kids Clothes Week- Day 1 The Izzy Top

Monday, January 27, 2014 •


I'm excited!!! I love Kid's Clothes Week! And now that I'm feeling energized and ready to go, my kids have gotten some great new clothes this week.

My first project is the Izzy Top. The lovely Teri from Climbing the Willow shared this awesome pattern on one of the facebook sewing groups I belong too and it very quickly turned into an Izzy top sew along, most of us have made more than one.  The first one I made with fabrics that are more in line with Spring but I couldn't help myself. This was the perfect article to really showcase this gorgeous Riley Blake fabric.


The fabric for the second top was a selfish pic. I didn't even ask Miss A if she liked it. I made up for it though by offering Smarties if she modeled it for me. It's so hard to get a picture of her these days where she isn't dirty. Feels like the minute after I wipe her face and brush her hair it needs to be done again...but I digress... 


The Izzy top is simple, sweet and perfect for everyday wear. It comes together easily (thanks to the fabulous step by step tutorial ) I did make it a little longer so it's more of a tunic at the moment. I also made these tops in size 4 instead of Miss A's current size 3. I want to get a lot of wear out of these tops.


Seriously how cute and practical are these?!?!

Kid's Clothes Week day 1

Monday, October 21, 2013 •

I had so much fun sewing for the last Kid's Clothes Week that I couldn't wait to do it again. Naturally I am getting overly ambitious and has a ton of big ideas for this week. And I have a lingering sinus cold and my sewing machine is eating needles... so today I'm posting a very simple but crazy cute appliqued shirt.


I found a pumpkin picture online. Flipped it and traced the image onto heat bond. I cut the shapes out of coordinating materials and used a brown fleece for the stem. I used fabric from October Afternoon and Adornit. Sometimes it is so hard to cut a fabric. I've got a bit of a stash built up and when just the right inspiration hits, I'll give I'm and cut something beautiful.  I know I'm not the only sewer with that problem! I've been holding onto so many pieces of the Fly a Kite line and this just seemed like the right time to use it.

After I ironed the pieces onto the shirt, I used a zigzag stitch to finish the applique and give it an embroidered look. (I want an embroidery machine oh so badly. ... Santa? ? I've been good! I swear! ) I finish every appliqued shirt with fray check. I like how it seals the seams. 

I love the orange floral print pants that were a hand me down that I have been wanting to put on Amelia for a while. This shirt pairs with them perfectly and just makes a perfectly sweet fall outfit.


This little girl is such a cutie pie! I know I'm a little bias but come on!


Love her pumpkin clip? Get one here

Never thought I would see this...

Thursday, September 19, 2013 •

I am thrilled that Shannon, owner of The Cotton Penguin, is a huge supporter or local mompreneurs. She 
ordered a dress from me for her daughter's birthday and was really happy, so happy that she asked if I would make a dress for her to carry IN HER STORE! That's pretty huge for me and I was absolutely up for the challenge. 

I don't typically make multiples of the same dress, but in the retail world it's kind of a necessity to do that. I wanted the dress to still be unique and so I decided to chose a fabric combination that I would make available only at The Cotton Penguin. I fell in love with this Nested Owls collection from Adornit Fabrics. Isn't it just the perfect combination of whimsy and fall? I wanted something that would work with our crazy weather here and so the Perfect Peasant Dress made sense- short sleeves work for the current warm afternoons and it can easily be layered with a long sleeve shirt  and leggings or tights when the colder weather moves in. This would be seriously cute with little boots...I might need to make yet another visit to Target for a pair for Amelia (It just opened two days ago and I've been there three times already).

I finished the dresses in time for the ECMC Pop up Fair in the Valley last weekend and handed them over to Shannon. On Monday she posted a picture on her Facebook page and I felt a little shiver of excitement seeing my dress up for sale.

photo credit: Shannon Sheilds

Shannon asked me to make something else for her (another post to come) and I went to her store to drop off her order. Walking through the door I was greeted by my creations!


I can't even tell you how it made me feel to see the items that I had worked so hard on placed up front and center in this great local business! It made my day. 

I know, I know- that is one adorable dress and no I can not make you one in that combination- unless you order it through Shannon. Go ahead- buy it here! ( And please do buy it- when she sells out she'll have to buy more!!!)

Kids Clothes Week Day 3

Wednesday, July 17, 2013 •

Hello Sunshine!


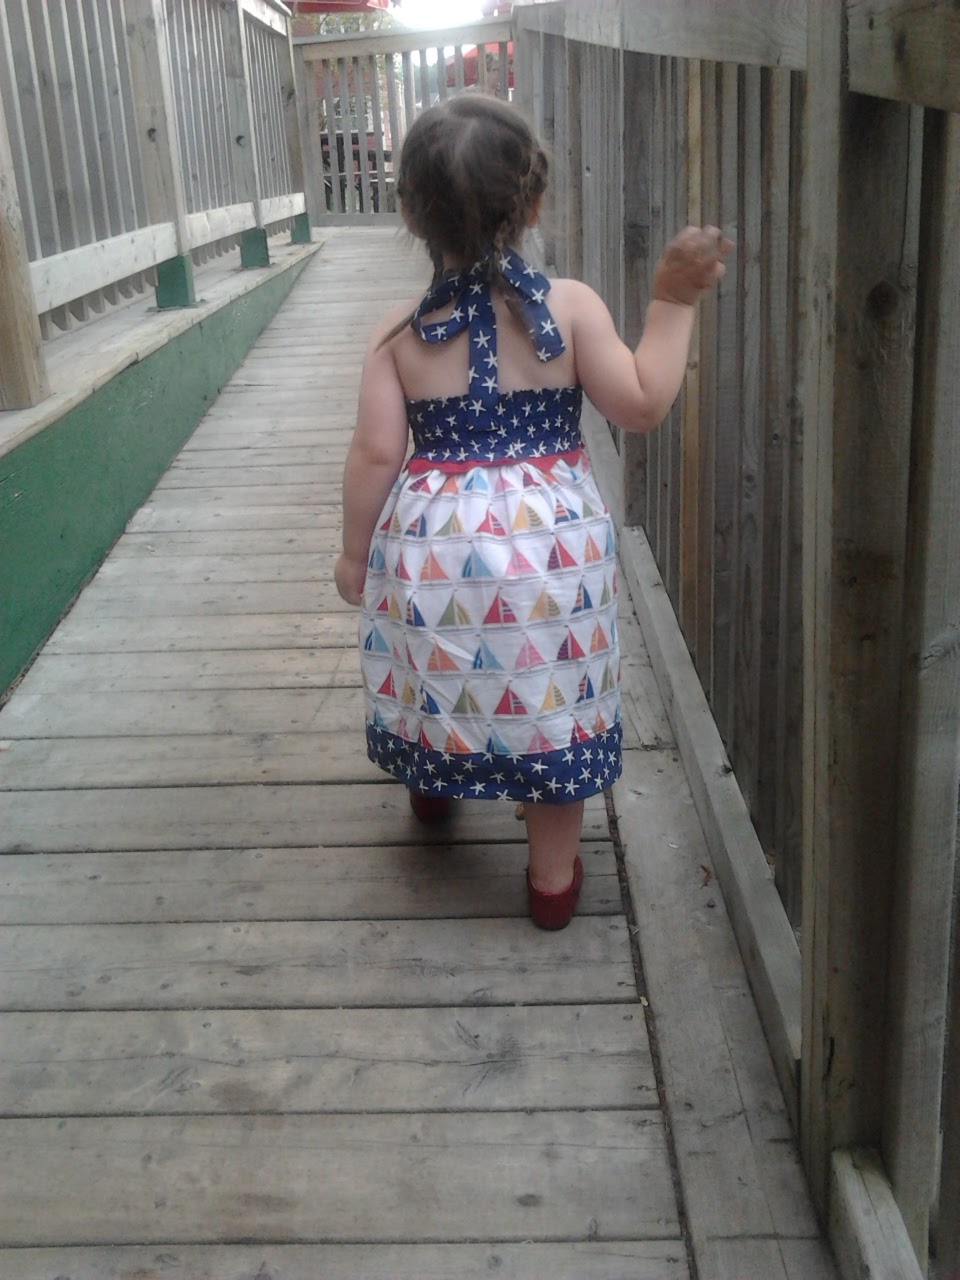
I am in love with a little green sundress that Miss Amelia had passed down to her from a friend. Problem is that it is getting too small. I put it on my little after she got out of the pool and realized that I might only a few more weeks out of it. I love the shirring on the back and how the skirt twirls. Then I remembered that I had pinned a tutorial awhile back and so the next day's sewing item was decided on!

I used the dress as a pattern and increased the size. As usual, I made the dress a little big. It's more a size 3 than a 2 but I want her to get as much wear out of these dresses as possible.


The top part of the dress is a lined front and a shirred back with halter straps. When I attached the skirt, I added some jumbo ric rac for a little pop of colour. I wish I had had enough to go around the bottom of the dress as well.  


Christine's tutorial over on her blog From an Igloo really helped me with the shirred back. I'm thrilled with how it turned out! The fabric is a mix of Shore Thing by Micheal Miller and a Dear Stella fabric that I cannot seem to find again anywhere! I bought it last year and now I wish I had more. This combination just screams Americana to me. A little ode to Aunt RyLee and Uncle Clay who live in Nashville and are celebrating their birthdays today (same day, same year...kinda weird but also cool). Happy birthday you guys!

I need to make more of these dresses. I just loved how it turned out!


A Rootin' Tootin' Nice Dress!

Thursday, July 4, 2013 •

A while back I found an imagine on Pinterest of a shirred sundress using western prints. I LOVED the fabric combinations. Naturally I searched high and low and could not find the fabrics that were in the original dress, however I think I found something better! I love a nice vintage inspired print. Micheal Miller's Lil' Cowgirl Blue was too cute to resist. I found two prints to coordinate (Seriously...cow print is just adorable!) and the fabric has been sitting in my stash for a few months.

A vintage filter just adds a little something to this!
I couldn't decide what type of dress to make. I stay away from shirring because my first couple of attempts just didn't turn out well. I ended up taking a few of my favorite dresses and come up with my own pattern (I'm sure there is something out there just like this if you wanted to look). I will post a tutorial as soon as I have more pictures of the process. But for now..here is my dress!

Dancing at the ball
I made a size 3 so it is a little big for her at the moment but I like to get as much wear out of outfits I make as possible. It fits now (with a little room) but it will fit perfectly in the next few months. This will be beyond cute in the fall with a little shirt under it. Oh Aunt Rylee!! We need cowboy boots!  Hook us up from Nashville :)


Yes, that is a Jessie (Toy Story) clip! You can got one of your own from Grasshopper Kids Creations (you can also buy the dress there too *wink,  wink*)

Enough Mom! (Two seconds later she was saying CHEESE!)


CopyRight © | Theme Designed By Hello Manhattan